A few days ago I was writing a program that required the use of new syntax from a newer standard of C++. I looked around trying to figure out where to tick a setting or add a line somewhere on Eclipse, but just couldn’t find where to do so! Now, I knew how to compile under the new standards on the Linux command line, but with the way my project was designed, being able to compile under Eclipse would be wayy more convenient. In this page, I will be going over how to compile C++11 under both the terminal and Eclipse.
Compiling under Ubuntu Terminal
Starting from the command line (I am running Ubuntu Linux 12.04), to compile a project under C++11, all you have to do is type:
g++ -std=c++0x *.cpp
Where *.cpp is replaced by the name of your driver file.
And run via
./a.out
All this is under the assumption that you already have the latest gcc installed. If you do not have them, here is a great tutorial by Colin Clark that explains how to do so. The version of Ubuntu he uses is 12.04 LTS (Long Term Support). That is also the version that I am using.
Compiling in Eclipse
To compile in Eclipse:
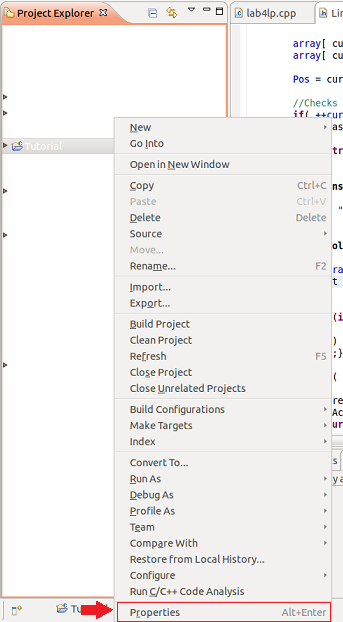
- Under the project explorer on the left sidebar, find your project and right click into Properties.

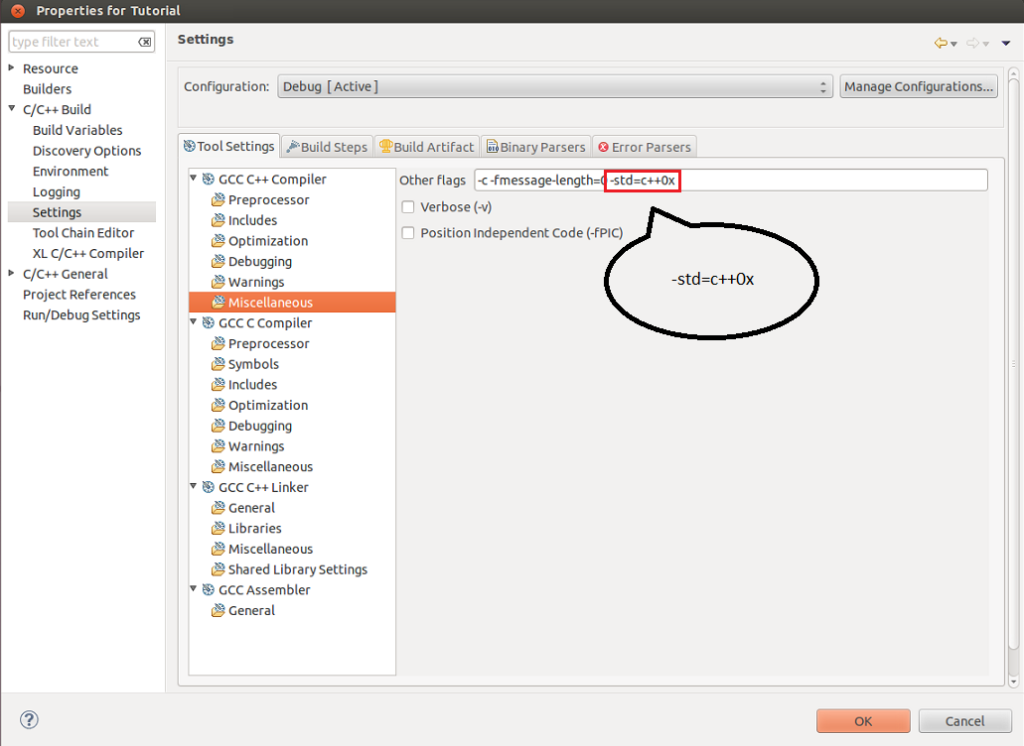
- In properties, find C/C++ Build and expand it.

C/C++ Build >> Settings >> GCC C++ Compiler >> Miscellaneous >> “Other flags” - Navigate settings and under GCC C++ Compiler, click into Miscellaneous.
- Add “-std=c++0x” onto the end of the line under “Other flags“.
And that is all. Congratulations, now go use the new auto function!

