This week I want to document how I created a simple web application that allows users to input a message, and in return display the number of characters in it. Not only was it simple to make, but useful in the real world too!
Final Character Count Page: https://itskevinlin.com/char-count-tool.html.
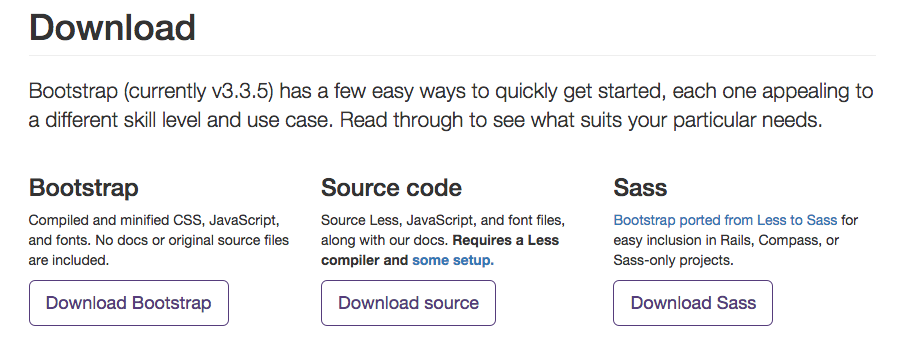
For this project, we will be using Bootstrap for the user interface, and basic JavaScript for the character counting functionality. To get started, download the compiled and minified version of Bootstrap from the official website.
Getting Started
To kickstart our project, we will be using the “Starter template” from Bootstrap as it is easy to configure and readily available. According to Bootstrap, the template contains “nothing but the basics: compiled CSS and JavaScript along with a container”. It’s true! You’ll see soon.
To download the starter template, click onto the Starter template URL above, and with the mouse, right click, “View Page Source” (on Google Chrome and Mozilla Firefox, other browsers should be similar). Copy the whole text and paste that onto a new file called charCounter.html (or anything you like — for example, index.html).
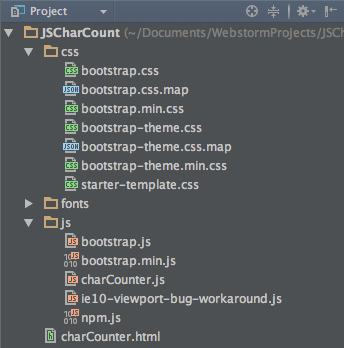
With Bootstrap downloaded and charCounter.html created, your file directory should look something like this (not exactly the same, but the structure should be identical — 3 folders and 1 file). Note: charCounter.html is inside the root directory, and not part of any folders.
Editing the newly created HTML file
Before we get started, let’s make a few changes to charCounter.html.
1. On lines 21-23, remove:
<!-- Just for debugging purposes. Don't actually copy these 2 lines! -->
<!--[if lt IE 9]><script src="../../assets/js/ie8-responsive-file-warning.js"></script><![endif]-->
<script src="../../assets/js/ie-emulation-modes-warning.js"></script>
2. Change the location of the Bootstrap stylesheet on line 15 to:
<link href="css/bootstrap.min.css" rel="stylesheet">
3. Change the location of Bootstrap.min.js on line 65 to:
<script src="js/bootstrap.min.js"></script>
4. Feel free to remove lines 66 and 67 for this project:
<!-- IE10 viewport hack for Surface/desktop Windows 8 bug -->
<script src="../../assets/js/ie10-viewport-bug-workaround.js"></script>
5. Add a source address for the charCounter.js file that we will be creating later. Add this after the js/bootstrap.min.js line in step 3 mentioned above.
<script src="js/charCounter.js"></script>
6. Create a new file called starter-template.css in the css folder, and paste the following into the file. Without this stylesheet, your web page may not display properly.
body {
 padding-top: 50px;
}
.starter-template {
 padding: 40px 15px;
 text-align: center;
}
If you didn’t follow that completely, don’t worry — I will be posting the completed HTML and JavaScript file below. 🙂
Now, let’s make this page our own!
We will start by changing the header and paragraph text. Below <div class=”container”>, you should see a <h1> header and <p class=”lead”> paragraph tag.

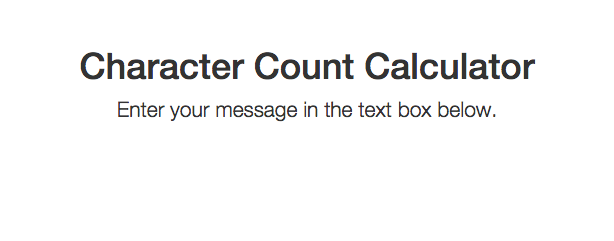
Let’s change the header tag to display “Character Count Calculator” and paragraph to display “Enter your message in the text box below.”
<div class="container">
    <div class="starter-template">
        <h1>Character Count Calculator</h1>
        <p class="lead">Enter your message in the text box below.</p>
    </div>
</div><!-- /.container -->
Awesome, your web page should be displaying something like this now:
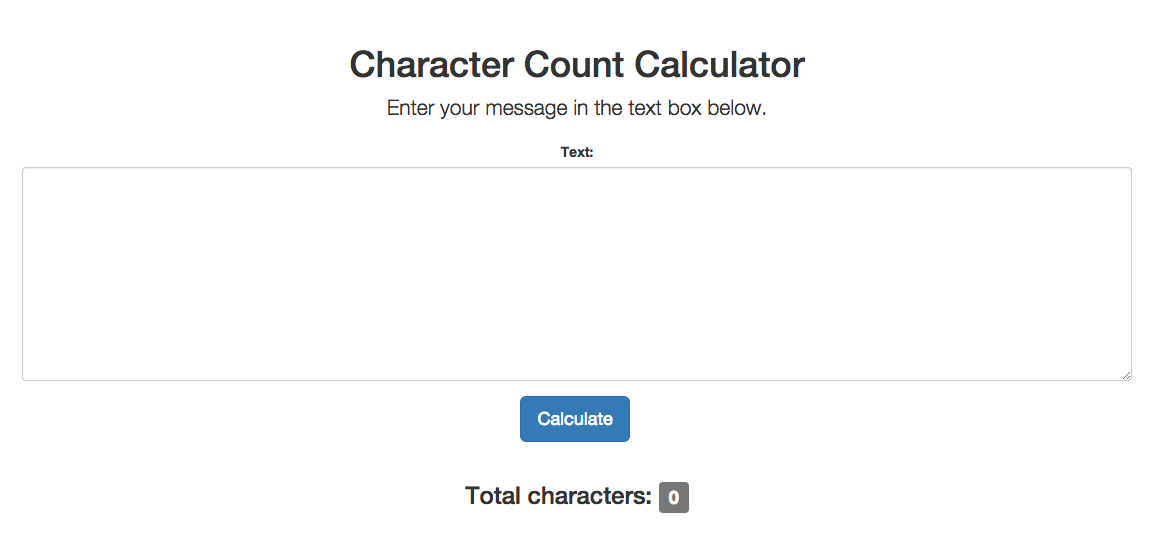
Let’s make it even better! Let’s add a text box so that users can input messages, and a button to calculate the number of characters they entered.
This is where Bootstrap comes in and becomes super useful. Bootstrap allows us to create visual elements (text box, buttons, labels, forms) extremely easily, and also make them responsive so that they are user friendly for different devices (smartphones, tablets, laptops, desktops).
Using Bootstrap, let’s add a text box first. Insert this code to the bottom of the paragraph tag (below </p>) but before the two </div> tags:
<div class="form-group">
<label for="inputMsg">Text:</label>
<textarea class="form-control" id="inputMessage" rows="10" id="inputMsg"></textarea>
</div>
Now, let’s add a button. This goes directly below the text box above.
<button type="button" id="submitButton" class="btn btn-primary btn-lg" onclick="clickEvent()">Calculate</button>
Finally, let’s add a label to show the user the final character count. We will also add two <br> line break tags to make it prettier: 🙂
<br><br>
<h3>Total characters: <span class="label label-default" id="resultBox">0</span></h3>
Your final HTML code for the above changes should look like this:
<div class="container">

<div class="starter-template">
<h1>Character Count Calculator</h1>
<p class="lead">Enter your message in the text box below.</p>

<div class="form-group">
<label for="inputMsg">Text:</label>
<textarea class="form-control" id="inputMessage" rows="10" id="inputMsg"></textarea>
</div>

<button type="button" id="submitButton" class="btn btn-primary btn-lg" onclick="clickEvent()">Calculate</button>

<br><br>
<h3>Total characters: <span class="label label-default" id="resultBox">0</span></h3>
</div>

</div><!-- /.container -->
Which should translate to:
Let’s Work on the JavaScript
The JavaScript portion is extremely simple — it is a few lines at most. We’re almost there!
Before, we mentioned a file called charCounter.js. Let’s create this JavaScript file now and put it into the /js/ directory. We already linked it in HTML on step 5 above, so we’re good to go!
charCounter.js contains all JavaScript code for our web page. In our case, it should only contain one simple — yet critical — function. It should:
- Read in a user’s message
- Determine when there are new lines and remove them so they don’t count as characters
- Return the length of the above message
In code, that means:
function clickEvent(){
var inputText = document.getElementById('inputMessage').value; //1
/*
   New line should not be counted as a character (or 2)
   g = global replacement. /replaceThingsHere/
   Replacing:
   \r\n
   \n
   \r
*/
inputText = inputText.replace(/(\r\n|\n|\r)/g,""); //2

//alert(inputText.length); //3
document.getElementById('resultBox').innerHTML = inputText.length; //4
}
Here, we created a function called clickEvent, which is called when our button is clicked (if you remember, we declared in HTML: <button type=”button” id=”submitButton” class=”btn btn-primary btn-lg” onclick=”clickEvent()”>Calculate</button>).
In //1, we read in the message that was entered into the text box we created earlier (note: method getElementById returns a reference to what is identified with the specified ID — in our case inputMessage. .value returns the value (text) contained in the text box), and stores that inside inputText.
In //2, we make sure that newlines in user’s inputs are not considered as characters when parsing the message. This happens because when a string is read in a system, newlines are represented in code as either \r\n, \n, or \r, and thus are considered as characters. We don’t want that, so we want to make sure that when any of the above are seen, we replace them with “”.
Visually explained, this line should yield a result of 4 total characters and not 5, which it does:
50
50
(50\n50 is parsed into 5050, which is 4 characters)
Midway into the function, I also added an alert box which you can see in //3. It is just a quick way I used to check my results. Console.log() (and many other methods) may also work, whatever is most comfortable with you.
At last, in //4, I changed the value of the resultBox label to show the return value of the .length method on the parsed inputText.
You may have noticed that in //1, I used .value to access the data stored in the text box, but in //4, I used .innerHTML. There is a reason for that: generally, .value is used for input/form elements, whereas .innerHTML is used for any object that can contain HTML (divs, spans, and similar elements).
And there it is!
A fully functional character count tool that can calculate the number of characters in any user-generated message!